Network Storage Connection with iSCSI
Tech Tips - By Vincent Chan - 13 Jun 2025 (Fri)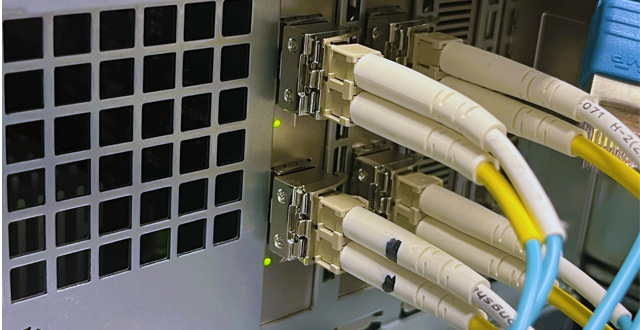
Many people carry portable USB drives for their data. However, these drives are easily lost or forgotten, which can lead to data loss. A more robust solution, common in server environments, is the iSCSI Initiator. This technology was developed by the Internet Engineering Task Force (IETF), an unsung hero of internet standards.
iSCSI, which stands for Internet Small Computer System Interface, functions much like a portable USB drive. The key difference is that the storage is accessed over an IP network instead of being physically connected. This is a game-changer for server administration, as it allows for easy configuration of additional storage over the network.
This method significantly reduces the risk of data loss because the storage drives are located in centralized, professionally managed storage farms. This setup enables the creation of high-performance and resilient storage solutions, such as RAID configurations, without the need to physically carry drives.
Setting up iSCSI on Ubuntu Linux Setting up iSCSI on Ubuntu Linux is straightforward if you understand the components involved. You'll need a stable network connection to your storage. While a single connection will work, a dedicated setup with two physical network interfaces for iSCSI traffic is highly recommended for redundancy and performance.
Ubuntu uses netplan for network configuration. Below is an example of the required netplan configuration.
Network Configuration with Netplan First, open your netplan configuration file. The name may vary, but it is typically located at
/etc/netplan/50-cloud-init.yaml. It's good practice to assign clear alias names to your network interfaces for easier configuration and troubleshooting. In this example, we'll use iscsia and iscsib.
network:
version: 2
renderer: networkd
ethernets:
enp5s0:
match:
macaddress: 32:22:58:69:87:85
set-name: eth0
dhcp4: true
dhcp-identifier: mac
enp6s0:
match:
macaddress: 32:22:58:69:81:82
set-name: iscsia
dhcp4: true
dhcp-identifier: mac
dhcp4-overrides:
route-metric: 300
enp7s0:
match:
macaddress: 32:22:58:69:80:83
set-name: iscsib
dhcp4: true
dhcp-identifier: mac
dhcp4-overrides:
route-metric: 300
In the configuration above, set-name is used to create aliases. If you only have one interface for iSCSI, you can adapt these instructions by only configuring the iscsia interface.
iSCSI Initiator Installation and Configuration
1. Install the open-iscsi Package
Begin by installing the open-iscsi package using the following command:
sudo apt install open-iscsi
After installation, you will find two important configuration files:
- /etc/iscsi/iscsid.conf
- /etc/iscsi/initiatorname.iscsi
2. Configure the Initiator Name
To make support and troubleshooting easier, it's a good idea to customize the initiator name to include the server's hostname.
Run this command to update the
/etc/iscsi/initiatorname.iscsi file:sudo echo 'InitiatorName=$(iscsi-iname):$(hostname)' | sed 's/.open-iscsi//;s/:.*:/:/' > /etc/iscsi/initiatorname.iscsi
Verify the change with:
sudo cat /etc/iscsi/initiatorname.iscsi
The output should look similar to this:
InitiatorName=iqn.2025-06.com:srvinclab01
3. Start and Enable the iSCSI Service
Now, let's ensure the iSCSI service starts automatically on boot. First, restart the service to apply the current configuration and then check its status.
sudo systemctl restart iscsid
sudo systemctl status iscsid
Finally, enable the service to start at boot:
sudo systemctl enable iscsid
Discovering and Logging into iSCSI Targets
You must configure the iSCSI interface on all hosts that need to connect to the storage. The following commands are for a single network interface. You may need to amend them to fit your specific iSCSI configuration.
1. Create a new iSCSI interface:
sudo iscsiadm -m iface -I iSCSI-A -o new
2. Update the interface with the correct network interface name:
sudo iscsiadm -m iface -I iSCSI-A --op=update -n iface.net_ifacename -v iscsia
3. Discover the available targets on your storage server: (Replace 172.16.1.101 with your storage portal's IP address)
sudo iscsiadm -I iSCSI-A -m discovery -t sendtargets -p 172.16.1.101
4. Log in to the target: (Replace the target IQN and IP address with the values from the discovery step)
sudo iscsiadm -m node -T iqn.2023-24.com.storage:dh7r749e0j -p 172.16.1.101 -I iSCSI-A –login
5. Configure the node to log in automatically at startup:
sudo iscsiadm -m node -p 172.16.1.101 -o update -n node.startup -v automatic
Multipath Configuration
You have now configured the iSCSI connection. If you are using multiple network paths for redundancy, you should configure multipathing.
1. Restart the multipath daemon and check for the new disk:
sudo systemctl restart multipathd
sudo fdisk -l
sudo lsblk
2. Verify multipath settings: For better readability, it's recommended to set user_friendly_names to no in the multipath configuration.
Check the current setting:
sudo cat /etc/multipath.conf
3. If user_friendly_names is set to yes, change it to no by editing the file:
sudo nano /etc/multipath.conf
Change the value from yes to no, then press Ctrl+O and Enter to save, and Ctrl+X to exit.
4. Finally, verify that the iSCSI configuration is correct:
sudo multipath -ll
Meet the Author

Vincent Chan has 23 years of experience in IT Architech, Operations, Consulting, Infrastructure Products Principle, and System Integration Solutions. He is passionate about solving challenges and constantly seeks to learn new technologies. His hobbies include photography. You can connect with him at vinc.chanmc@yahoo.com.

Galloping into Prosperity Year
Tech Lifestyles - By Vincent Chan
08 Mar 2026 (Sun)

Start With Prosperity and Productivity
Tech Lifestyles - By Vincent Chan
25 Feb 2026 (Wed)

Crossing the Threshold to 2026
Tech Lifestyles - By Vincent Chan
28 Dec 2025 (Sun)

Patches Deferred Due to Phasing (Ubuntu)
Tech Tips - By Vincent Chan
17 Dec 2025 (Wed)

Chasing Cherry Blossoms Dream
Tech Lifestyles - By Vincent Chan
07 Nov 2025 (Fri)

Losing Our Humanity via Digital World
Tech Lifestyles - By Vincent Chan
21 Oct 2025 (Tue)

As a Ferrari Fan at Zandvoort
Tech Lifestyles - By Vincent Chan
01 Sep 2025 (Mon)
Network Storage Connection with iSCSI
Tech Tips - By Vincent Chan
13 Jun 2025 (Fri)

The Evolution of Battery Technology
Tech Tips - By Vincent Chan
10 Jun 2025 (Tue)

The Reality of IT Lifestyle
Tech Lifestyles - By Vincent Chan
03 Jun 2025 (Tue)